INTRODUCTION TO IOS LOCALIZATION
Lecture One: Basics
1. What is iOS Localization
iOS Localization is the process of rendering the content of your app into multiple languages. It is a crucial step to acquire overseas users from over 150 countries via Apple’s iTunes App Store. Using iTunes Connect, you can indicate whether your app is available in all territories or specific territories. Then you customize your app for each target market that you want to support. Users in other countries want to use your app in a language they understand and see dates, times, and numbers in familiar, regional formats.
In this tutorial we will walk through the basic steps for iOS localization.
2. Internationalization
But before you can localize your app, you have to internationalize it. Internationalization is the process of making your app able to adapt to different languages, regions, and cultures. It involves 2 parts:
- User-Interface (
.xib,.nib,.storyboard) - Code (
.m,.swift, etc..)
Internationalizing User-Interface
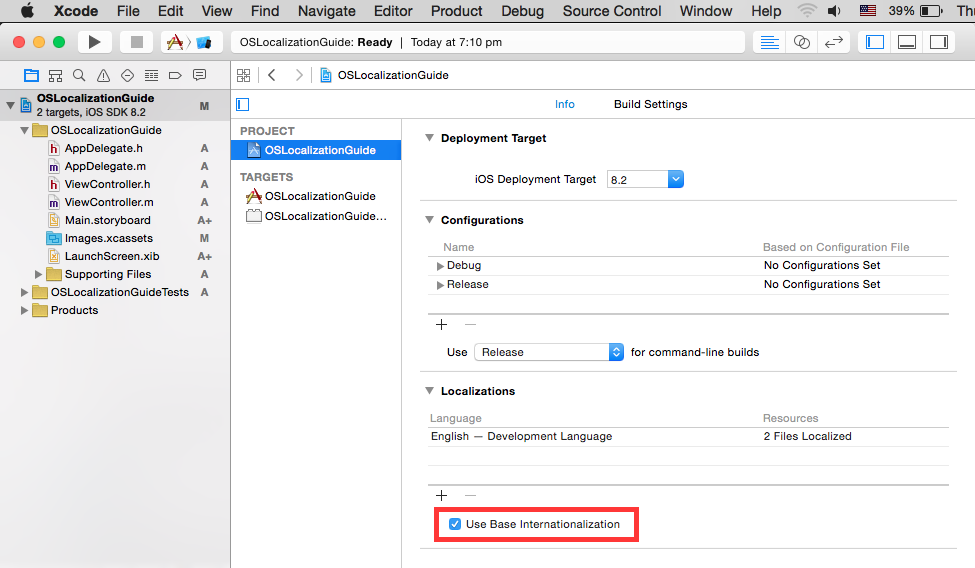
The easiest way to internationalize your user interface is by enabling Base Internationlization. Since Xcode 5, it has been enabled by default. You can verify
your settings in Project Editor > Project > Info.
What does it do? By enabling base internationalization Xcode modifies your project folder structure. The .xib &.storyboard files will be moved to Base.lproj folder while the string elements will be extracted to the project locale folders e.g. en.lproj.
Tips: Remember to save new user interface files that you want to localize to the Base.lproj folder so that they support base internationalization as well.
Right now there’s no string in our user interface, let’s add some text and see how it works.
2a. Update strings in user-interface files
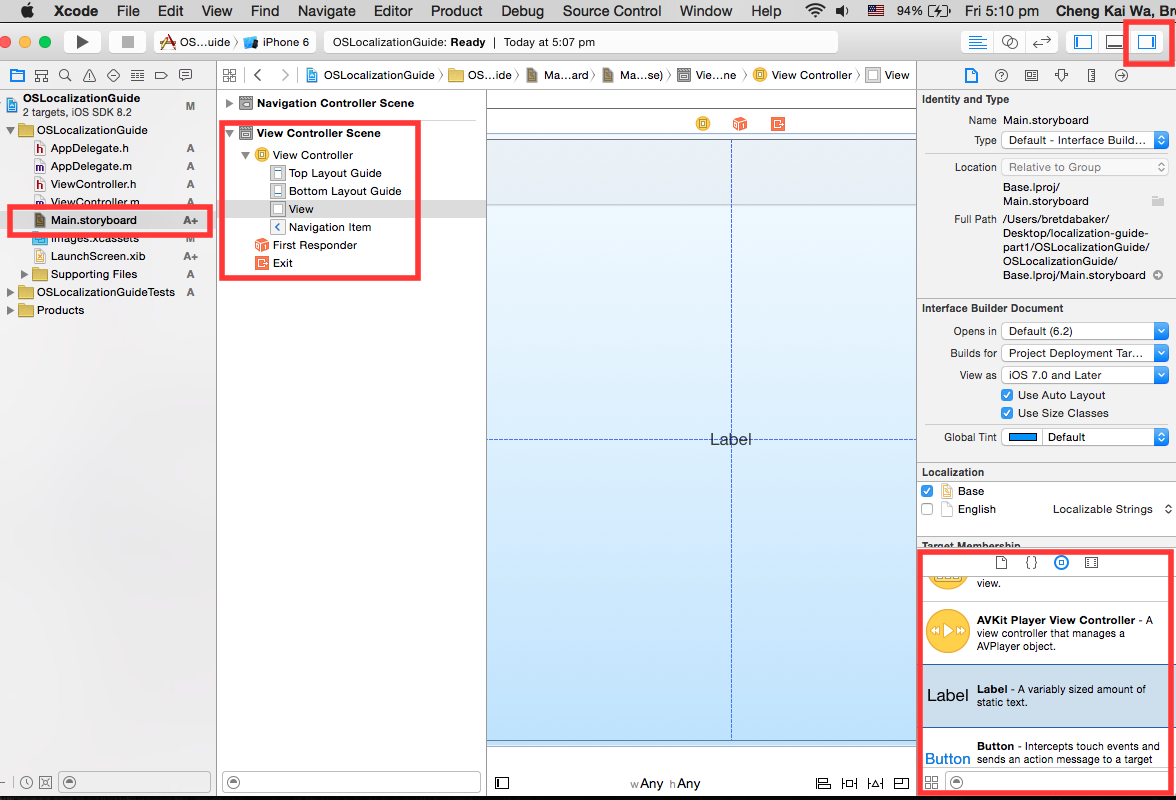
Open Main.storyboard and open the Utilities panel, drag a label from the Object library to the view in the View Controller Scene.
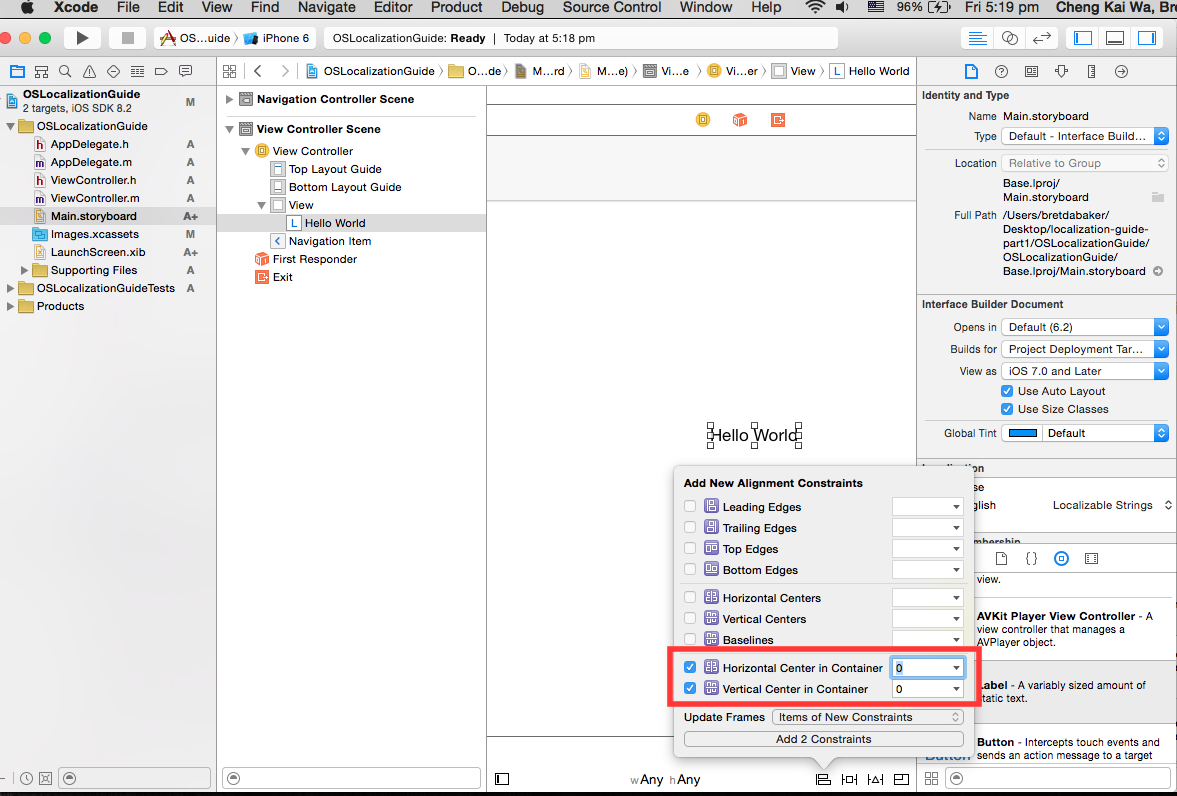
Change the text to Hello World and center the label to the view via Auto Layout.
Why Auto Layout? From Apple’s Internationalization and Localization Guide:
Use Auto Layout to lay out your views relative to each other without fixed origins, widths, and heights, so that views reposition and resize appropriately when the language or locale changes. Auto Layout makes it possible to have one set of .storyboard and .xib files for all languages.
Now let’s update/extract the base strings in Main.storyboard. Simply check English under Localization section of File Inspector.
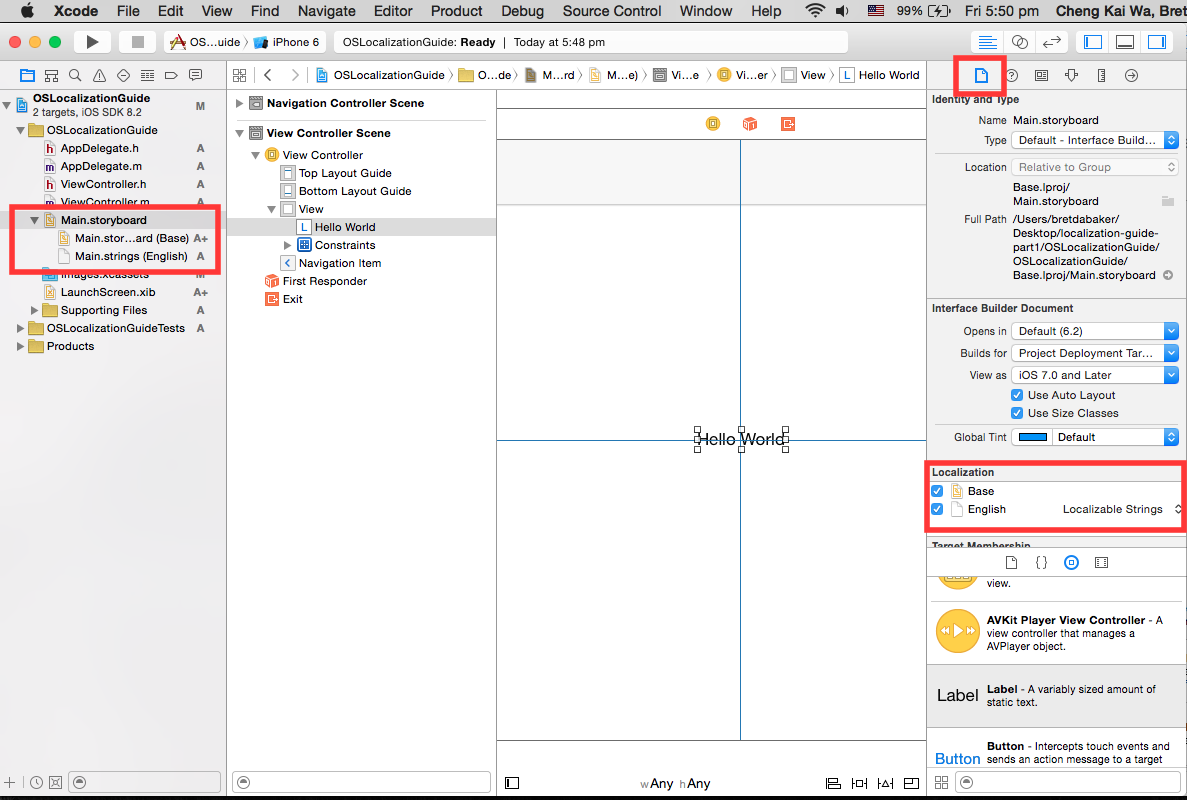
In Project Navigator you can see there’s a new file named Main.strings under Main.storyboard group, the file is generated by Xcode and saved in the en.lproj folder. Let’s what’s inside:
/* Class = "UILabel"; text = "Hello World"; ObjectID = "ybw-Mb-5gb"; */
ybw-Mb-5gb.text = "Hello World";
The key on the left is composed of the Object ID ybw-Mb-5gb and attribute text of the label in the user interface file. The value is simply the text you entered.
Do not change the key or filename otherwise Xcode will not be able to read the localized strings at runtime. Instead, make use of the comments to provide the context of the elements.
2b. Internationalizing Your Code
Additionally, we should get our code ready for localization. First we need to separate user-facing text from code using the NSLocalizedString macros:
NSLocalizedString(key, comment)
NSLocalizedStringFromTable(key, tbl, comment)
NSLocalizedStringFromTableInBundle(key, tbl, bundle, comment)
NSLocalizedStringWithDefaultValue(key, tbl, bundle, val, comment)
If you inspect these macros (click while holding command key), you will see that they all call -[NSBundle localizedStringForKey:value:table:] with different targets and parameters.
How NSLocalizedString Works
The system will look for the string that matches the key from the tbl in current locale. tbl is the filename without .strings file extension, the default table is Localizable if not specified. comment is used to provide the context of the localized string, and also for generating the comments in .strings files, we will cover that in a future article.
Let’s wrap the navigation title of our view controller so that the navigation bar can display it in different languages. InViewController.h, add the following code:
- (void)viewDidLoad {
    [super viewDidLoad];
    self.navigationItem.title = NSLocalizedString(@"nav-title-hey", @"Navigation Title: Hey");
}
Create the Strings File
Similar to internationalizing user interface files, we need to create a .strings file in order for the system to find the string for the key. For the purpose of this tutorial we will create the file manually, in a future article we will talk about different ways to generate/maintain your .strings files.
Right click the Supporting Files under Project Navigator and select New File…, then choose Resources > Strings File.
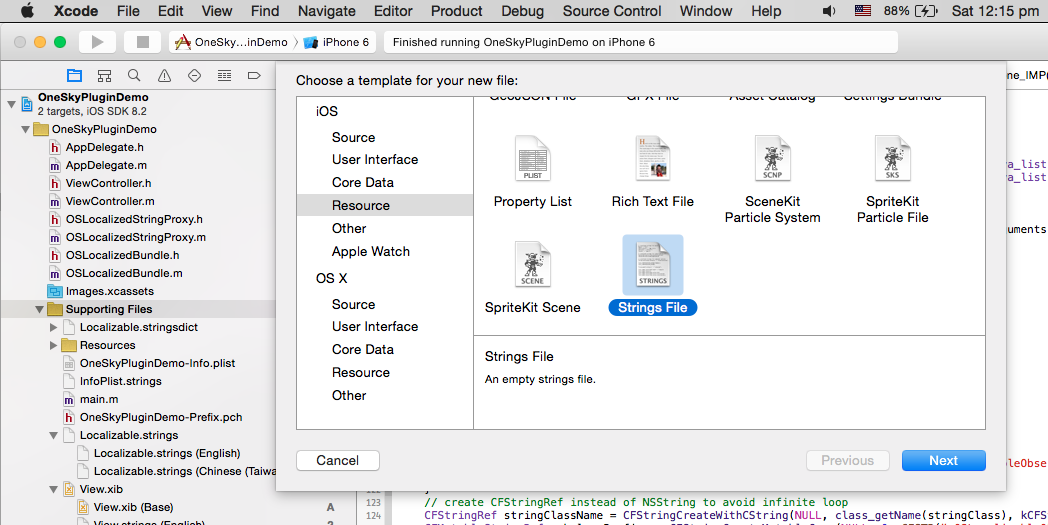
Click next and save the file to en.lproj folder as Localizable.strings.
Now open the empty strings file, add the navigation title and save.
/* Navigation Title: Hey */
nav-title-hey" = "Hey";
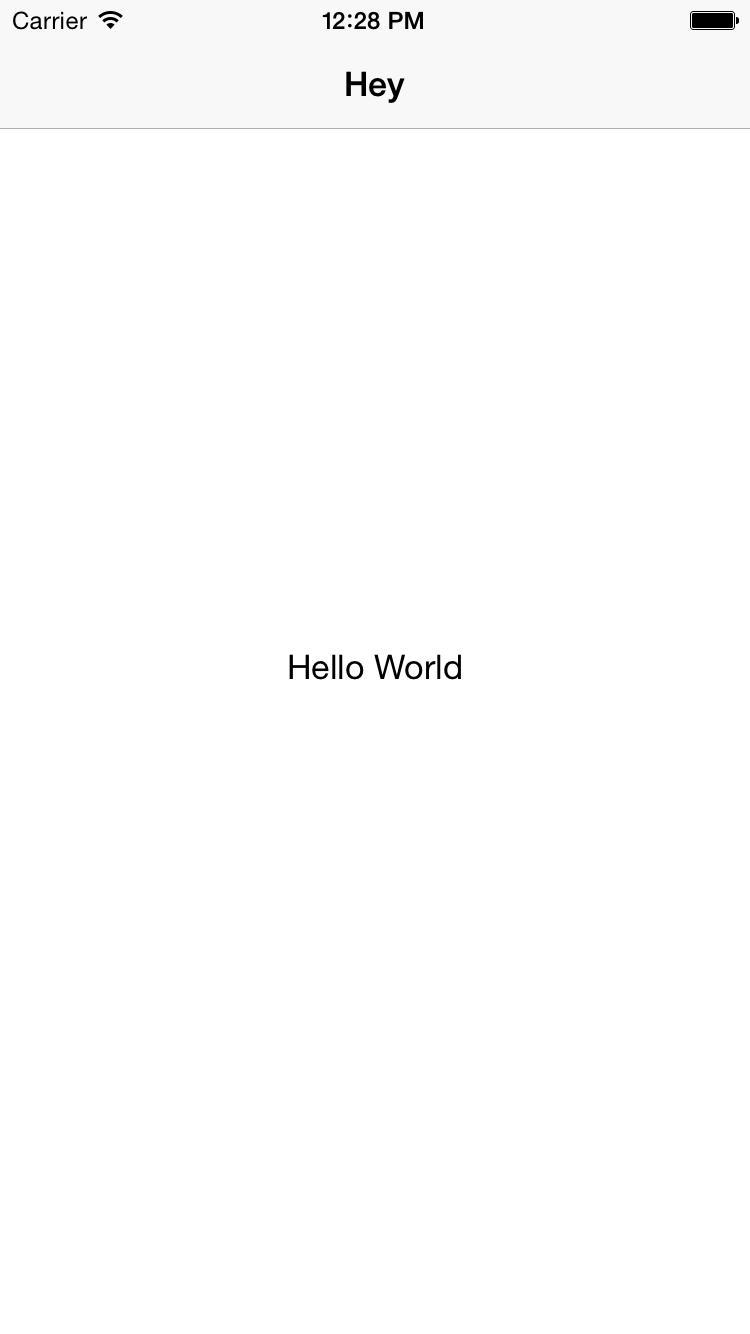
Running the app
You should see that the app is loading strings from our .strings files.
3. Localization
Now that our project is ready for localization, let’s add a new language.
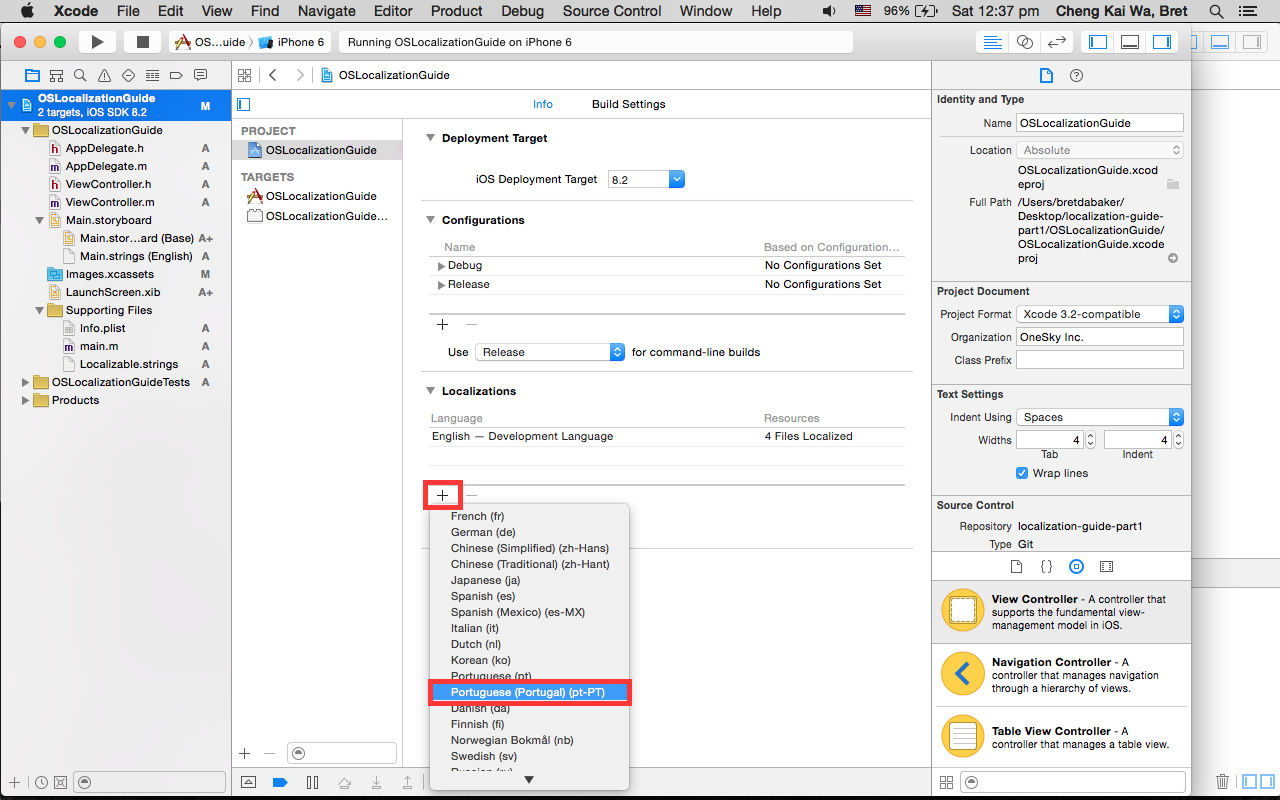
3a. Add a New Language
Select the project from Project Navigator and click + under Localizations. Select Portuguese.
A dialog pops up:
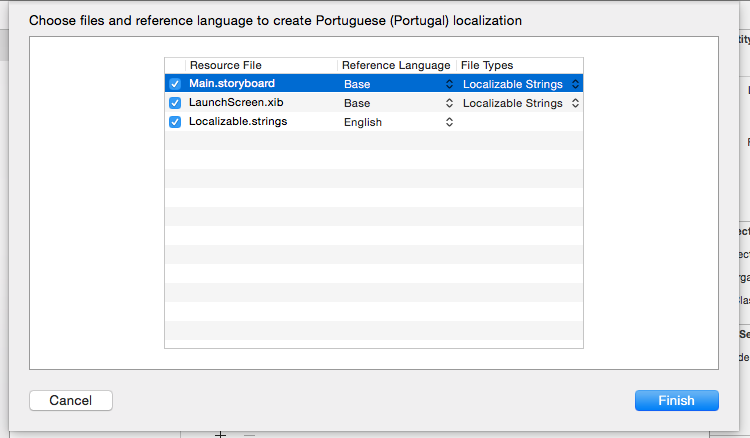
In the dialog, choose which language to reference from for each file, and pick whether to localize the whole user interface file or just the strings.
Click Finish and Xcode will generate a new set of .strings files in pt-PT.lproj folder.
3b. Translate
You can now send the files to your translators or translate the strings yourselves.
Main.strings
/* Class = "UILabel"; text = "Hello World"; ObjectID = "ybw-Mb-5gb"; */
"ybw-Mb-5gb.text" = "Olá Mundo";
Localizable.strings
/* Navigation Title: Hey */
"nav-title-hey" = "Oi";
That’s it! Our app now supports Portuguese!
4. Testing Localization
How do you test if the localized strings are displaying correctly? You can of course manually switch the language of your simulator or device, but there’s an easier way.
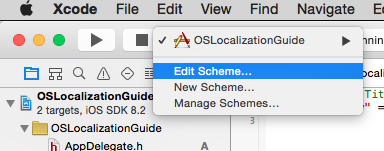
4a.Edit Scheme
Click the active scheme from the toolbar and select Edit Scheme….
Under Run > Options > Application Language , select the languag you want to debug:
There are other scheme options for debugging localization. You can find information on Apple’s Documentation Website: Testing Your Internationalized App.
4b. Run in Portuguese

That’s it. Your app is localized in Portuguese well and fine.
Next up
In this tutorial we have covered the basics of internationalization and localization. Remember to download the source code at the right box (or at the bottom if you’re browsing on mobile).
For the next tutorial, we will go through the best practices of handling format strings and plurals.
Go back to OneSky Localization Academy
Go to Lecture Two: Format Strings and Plurals
About OneSky
OneSky provides seamless end-to-end localization solutions for thousands of mobile apps, games, websites, and businesses worldwide. We offer professional translation services in 50+ languages and a translation management system (TMS) with API integrations and plugins to streamline your workflow. We hire and carefully screen our own translators to ensure the highest control over quality. Using OneSky’s powerful QA features, cross-functional teams collaborate efficiently to deliver faster release cycles and higher quality translations. See how you can go global at www.oneskyapp.com

 Written by


 Written by