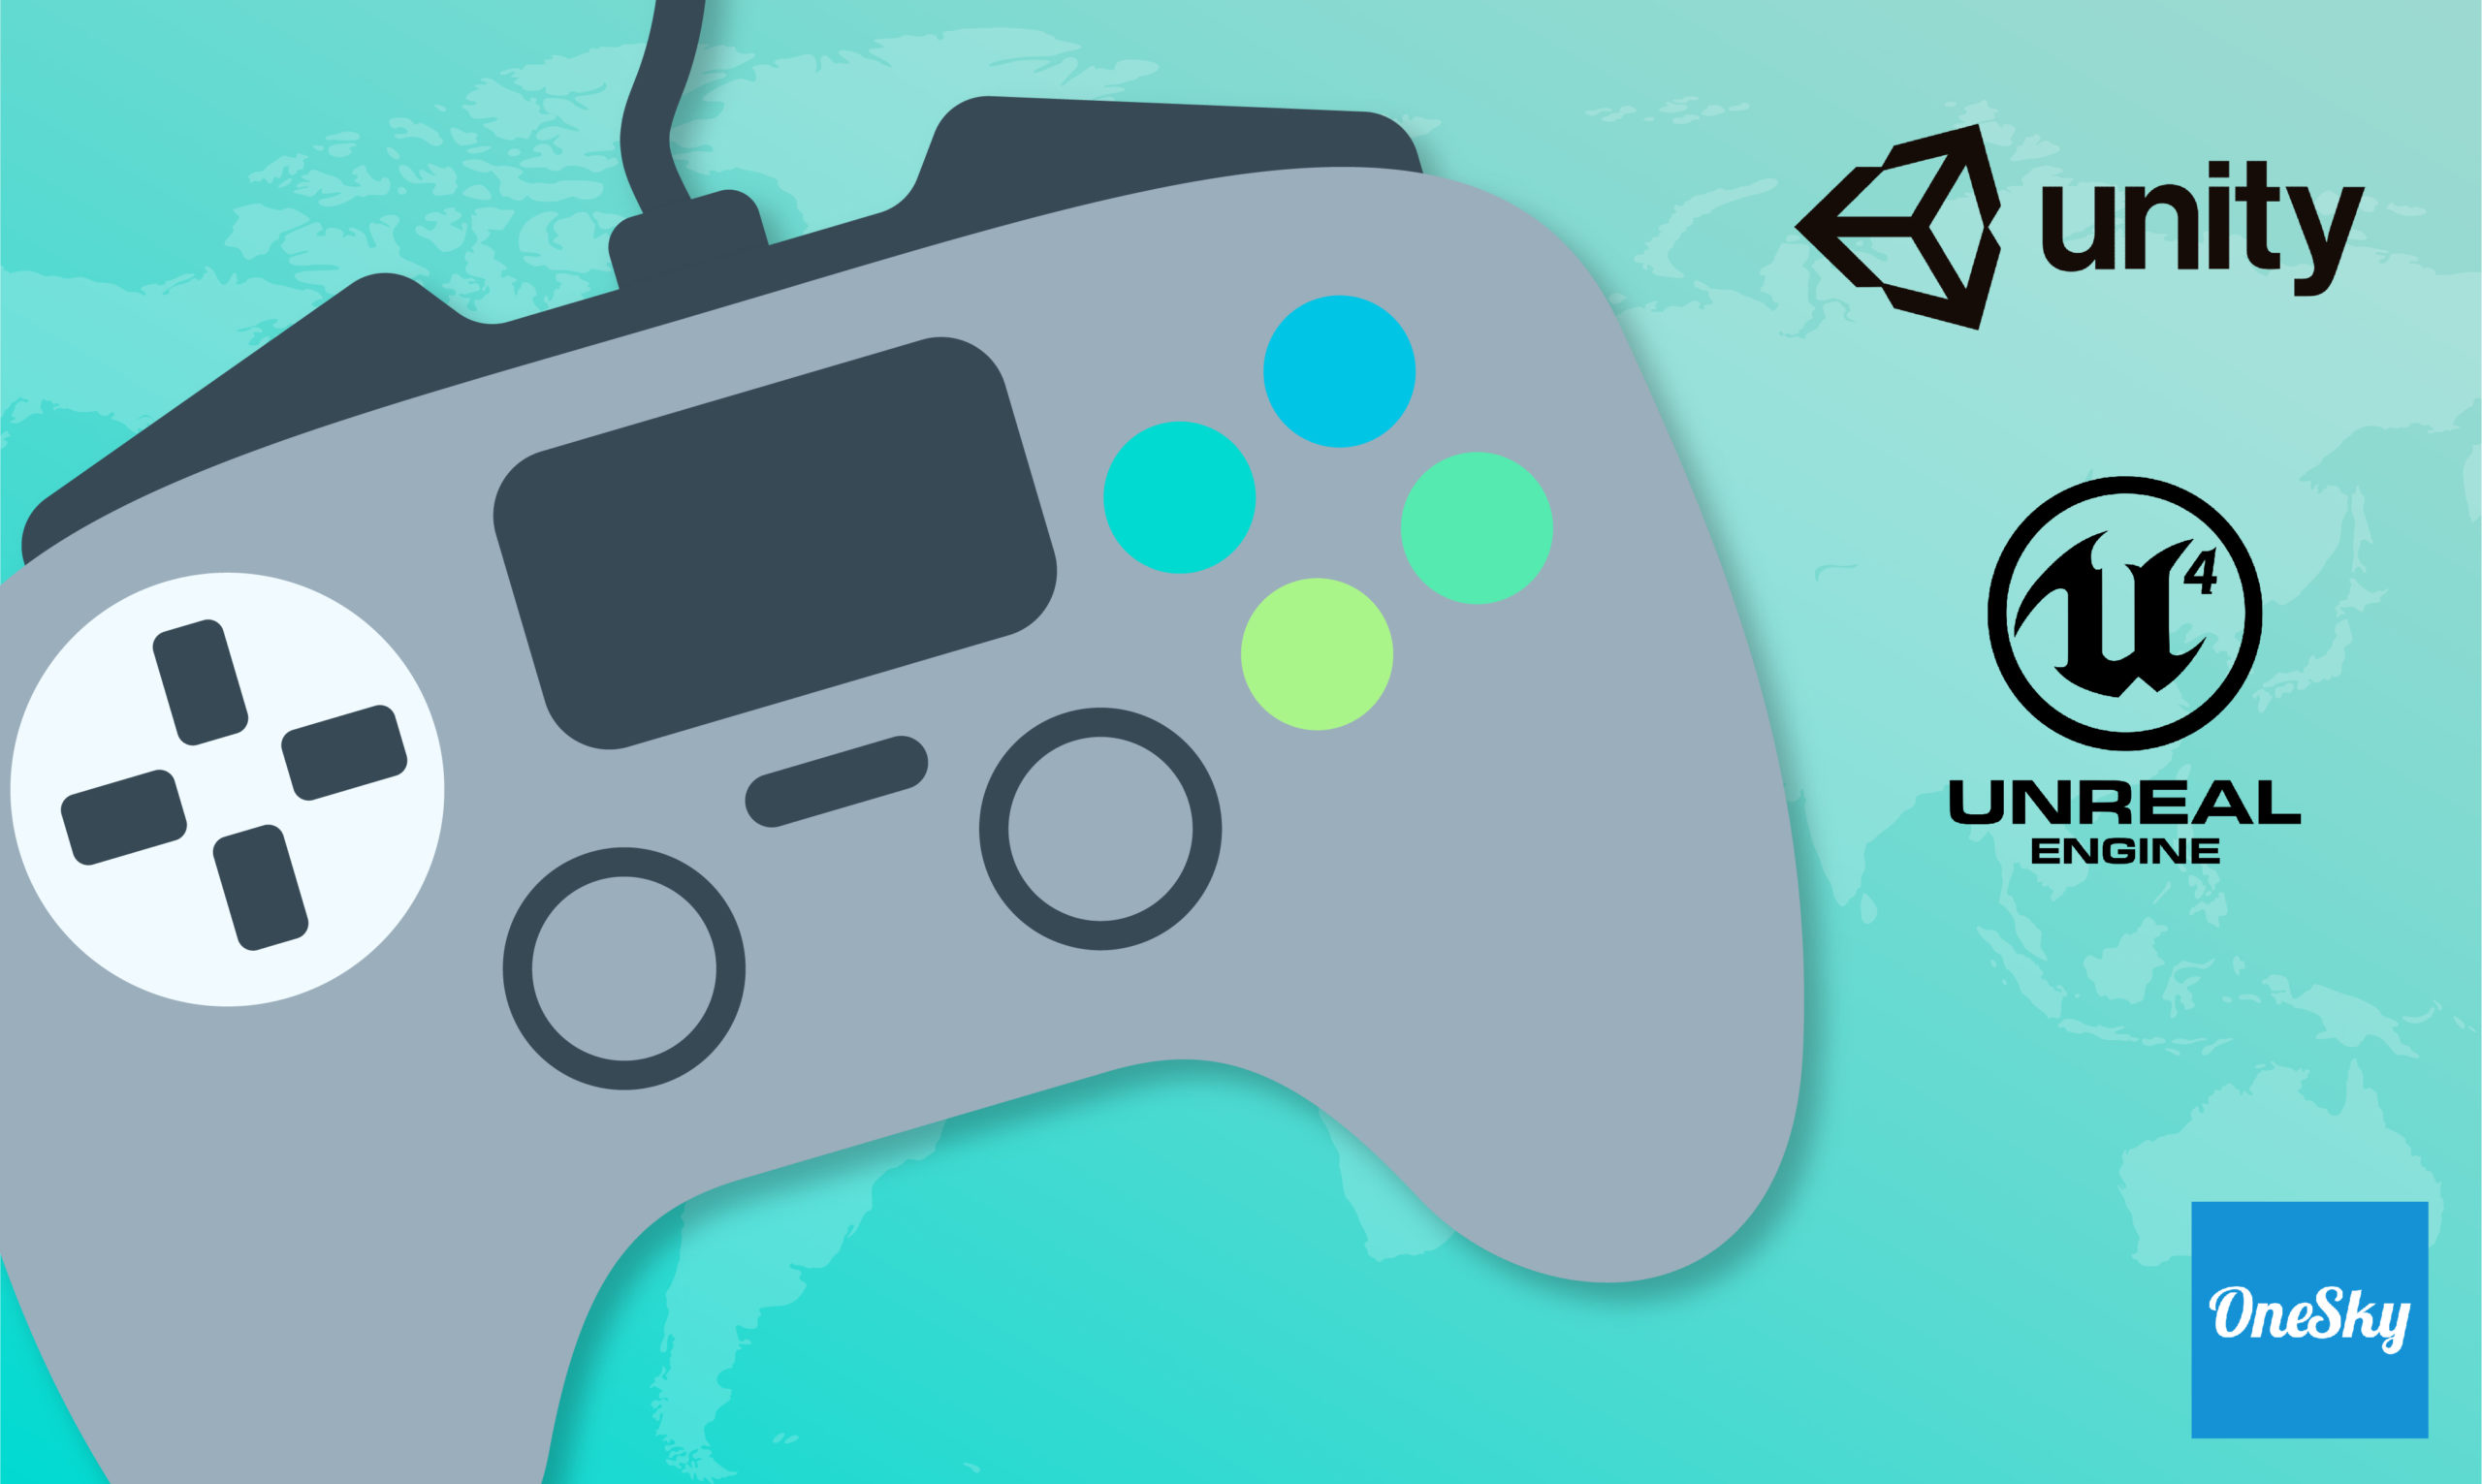
A Guide to Game Localization in Unity 3D and Unreal Engine
Unity and Unreal Engine (UE4) are popular because of their highly immersive gaming experience. To fully engage with users and build a loyal following, you need to connect with gamers in their native languages.
Asia, Europe, and Latin America all have large gaming communities that are fast expanding. By localizing your game for these markets, you can open up more opportunities, expand your audience base, and increase engagement with gamers worldwide.
Localization is complicated. The good news is that these two gaming platforms offer various unique features for Unity smart localization and UE4 automatic localization. We’ll show you how to combine these functions with game localization best practices to localize your video game for the win.
Unity Smart Localization
Unity 3D supports game development and localization on 25+ platforms with built-in localization components, which help developers minimize extensive coding and shorten turnaround time. Here are some Unity smart localization best practices you should follow.
Prepare For Unity Translation and Localization
Here’s how to set the stage for success before you start the Unity localization process:
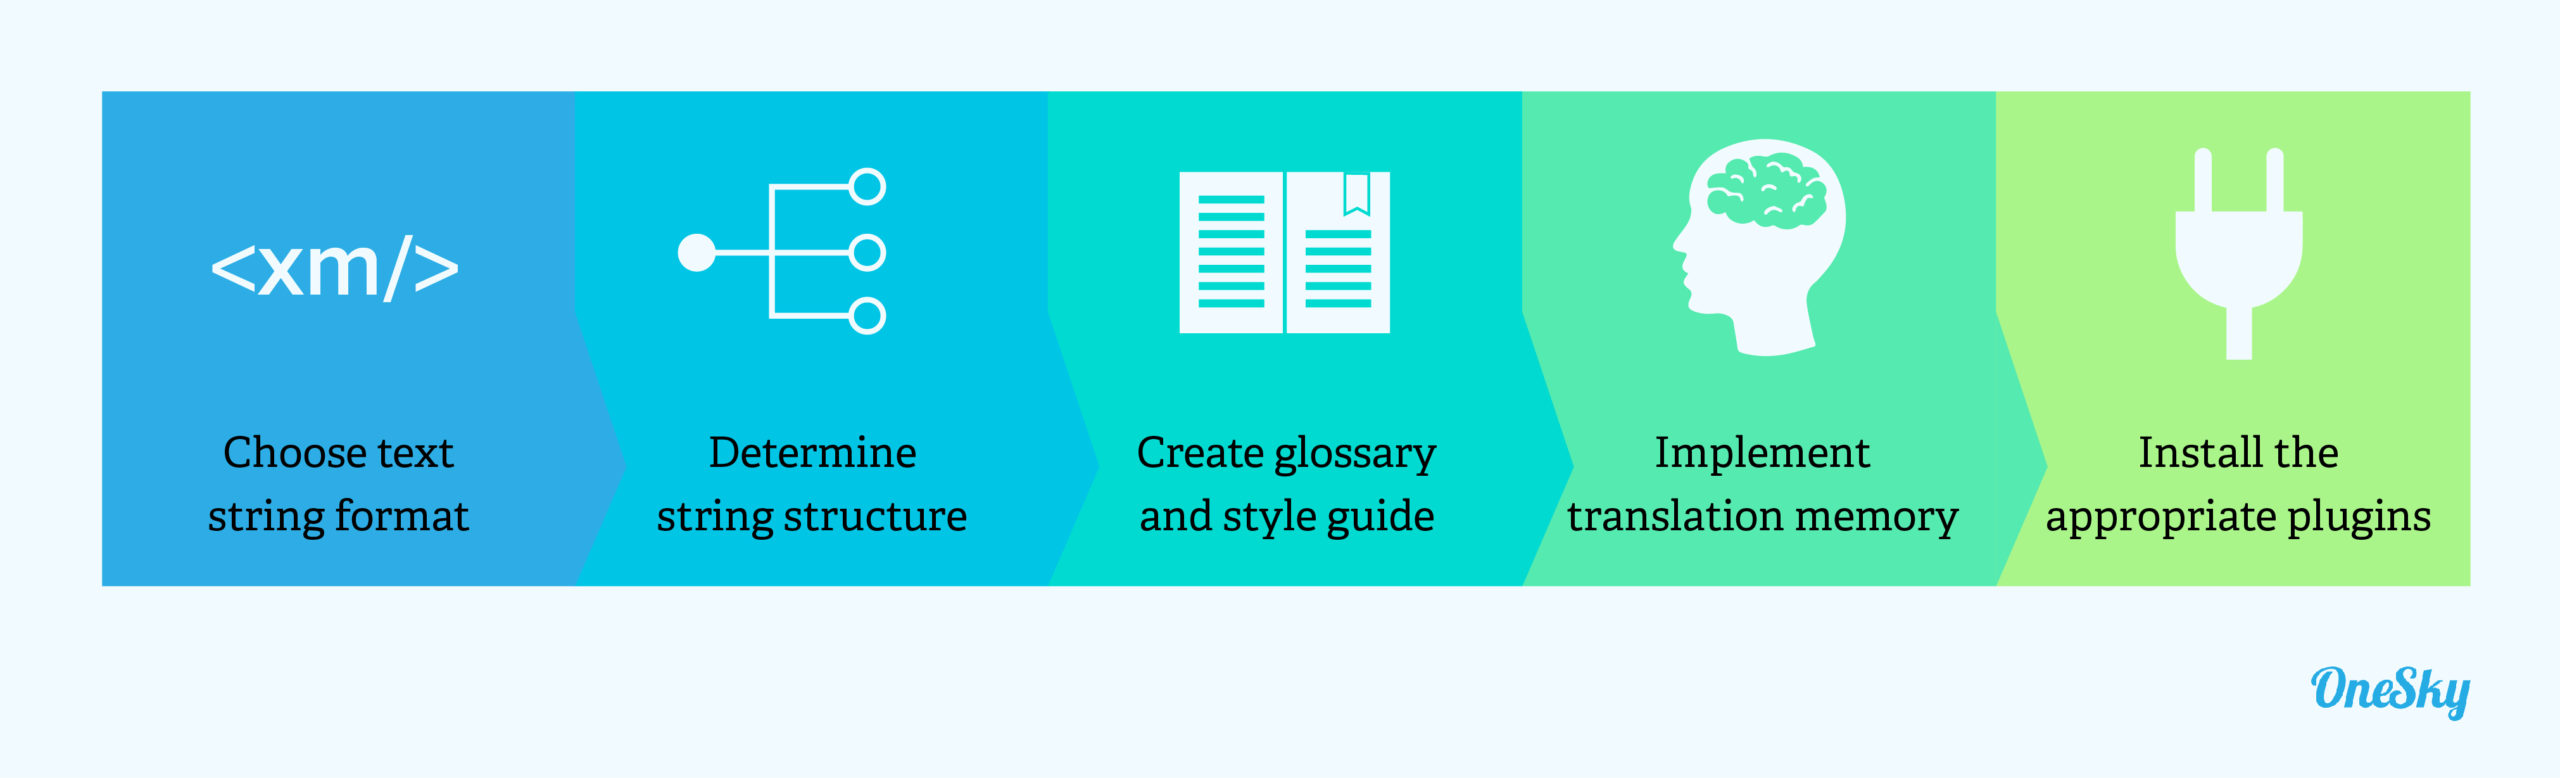
- Decide on the text string format for your localization process. Unity 3D supports various popular formats, including JSON, XML, YAML, CSV, and more. Each has its pros and cons. For example, JSON is often easiest for developing games in JavaScript, but not all developers prefer this format.
- Determine the string structure, which can impact translators’ efficiency and accuracy. Your strategy should allow developers to easily separate strings by language and create string IDs so they can be located efficiently. Also, keep the strings as straightforward as possible.
- Create a translation glossary and style guide, so translators can follow a consistent set of linguistic rules to maintain a cohesive gaming experience.
- Use a localization management platform with a translation memory feature to help improve translation quality and accuracy over time. Translation memory can also help shorten launch timelines and reduce translation costs.
- Install plugins for each target language to streamline the extraction and re-insertion of content in future updates.
Localize Visual Elements
Unity is highly visual, so you must consider the many graphic elements during the localization process to preserve the gaming experience.
You can use Unity Sprite Packer to create atlases. The initial upfront efforts will reward you with a consistent performance accompanied by high-quality graphics. Alternatively, you can replace graphic elements with text and UI elements to simplify the process and deliver a high-performing game.
The font you use in the original version may not work for another language. Explore using different fonts and consider their cultural connotations. You may have to adjust the font size to deliver a consistent overall visual experience.
Address Language and Cultural Differences
Besides language translation, you must address cultural differences. This can help you engage audiences with slang and expressions appropriate for each locale.
Your localization process needs to address different types of content, including in-game, non-string, and in-store elements. In particular, the in-store copy makes the important first impression that engages the audience so they’d purchase the game. Low-quality translation and poorly formatted text can turn potential customers away.
Not every piece of text should be localized. Some character or weapon names that carry specific meanings may need to stay in their original language to preserve the game experience. In this case, a direct translation may not work.
Leverage Unity Localization Preload and Components
Unity offers an internal localization tool that supports region-specific languages and creates accurate localization experiences based on different dialects. Unity is preloaded with many popular locales and supports various languages, including French, Italian, Bulgarian, Arabic, Japanese, Greek, and more. You can store information, such as currency, date, and time formats specific to your locales.
You can also create components in Unity, which help reduce manual coding to save time and minimize errors. For example, you can use Unity components to let users change language, save the new language, select the language automatically when the game restarts, and load the current strings for each value.
Hire a Professional Translation Service
Hire professional translators who are native speakers of the target languages and live in the target regions. They should be connected to the local culture, understand the cultural sensitivities, and specialize in game localization for the specific locales. They should also be familiar with various localization tools, such as the translation management system (TMS) you’ll be using.
To facilitate the translation process and preserve the game experience, provide translators with as much context as possible. For example, give them a summary of the storyline and biographies of the main characters. This helps ensure that the translated copy is not only accurate but also delivers the intended experience.
Unreal Engine (UE4) Localization
Unreal Engine localization involves UE4 text localization and UE4 asset localization. You can leverage various UE4 automatic localization tools to save time and effort. Here are some best practices to follow.
Get to Know the UE4 Localization Dashboard
UE4’s built-in localization dashboard allows you to gather and export text into a portable object (PO) file, import translated PO files into the platform, and incorporate the content with the “Compile Text” feature. You can also facilitate the localization process with functions such as “Import Script,” “Import and Export Script,” and “Count Words.”
Set the Stage for UE4 Text Localization Success
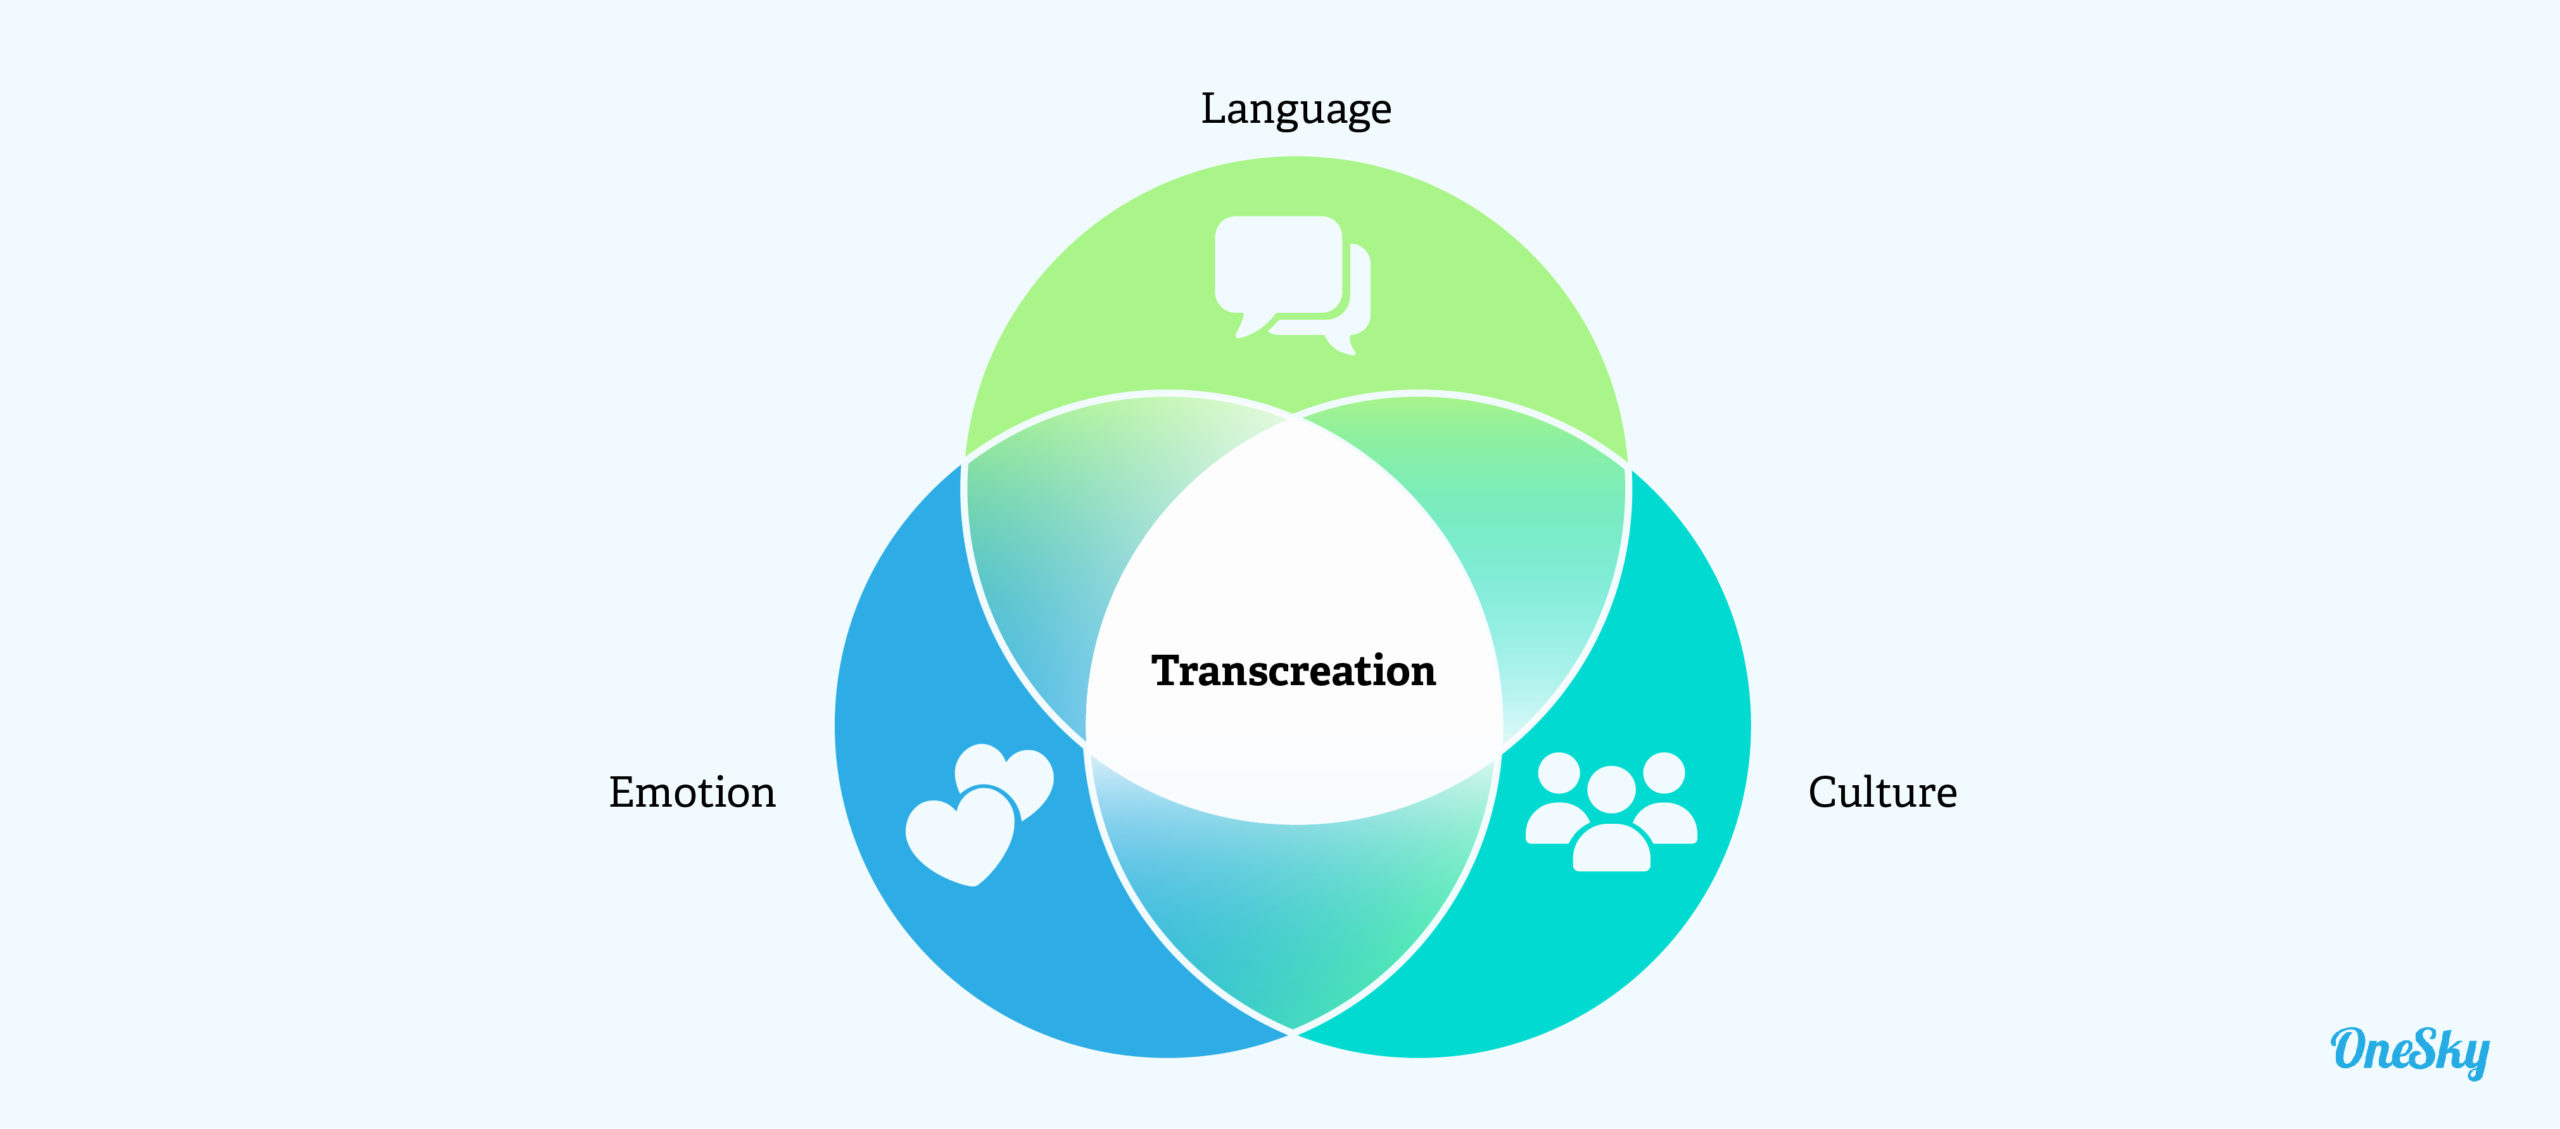
Before you start the localization process, confirm that all the content is localizable. For example, the text should not be hard-coded into the software. Next, work with developers to ensure that the interface can accommodate the expansion and contraction of the translated content. Developers may need to collaborate with translators in a transcreation process to reduce text lengths while preserving the context.
Consider replacing text with common icons — a universal language that doesn’t require translation. This can minimize issues with text lengths and reduce the amount of text that requires translation.
You also need to internationalize your game to ensure that the code base, architecture, and UI can display translated game content for different locales. During the internationalization (i18n) process, developers will pull all the text strings into a resource file for each target language. The process must account for pluralization rules, automatic line breaking or text wrapping, punctuation rules and date, time, currency, and numeric formats.
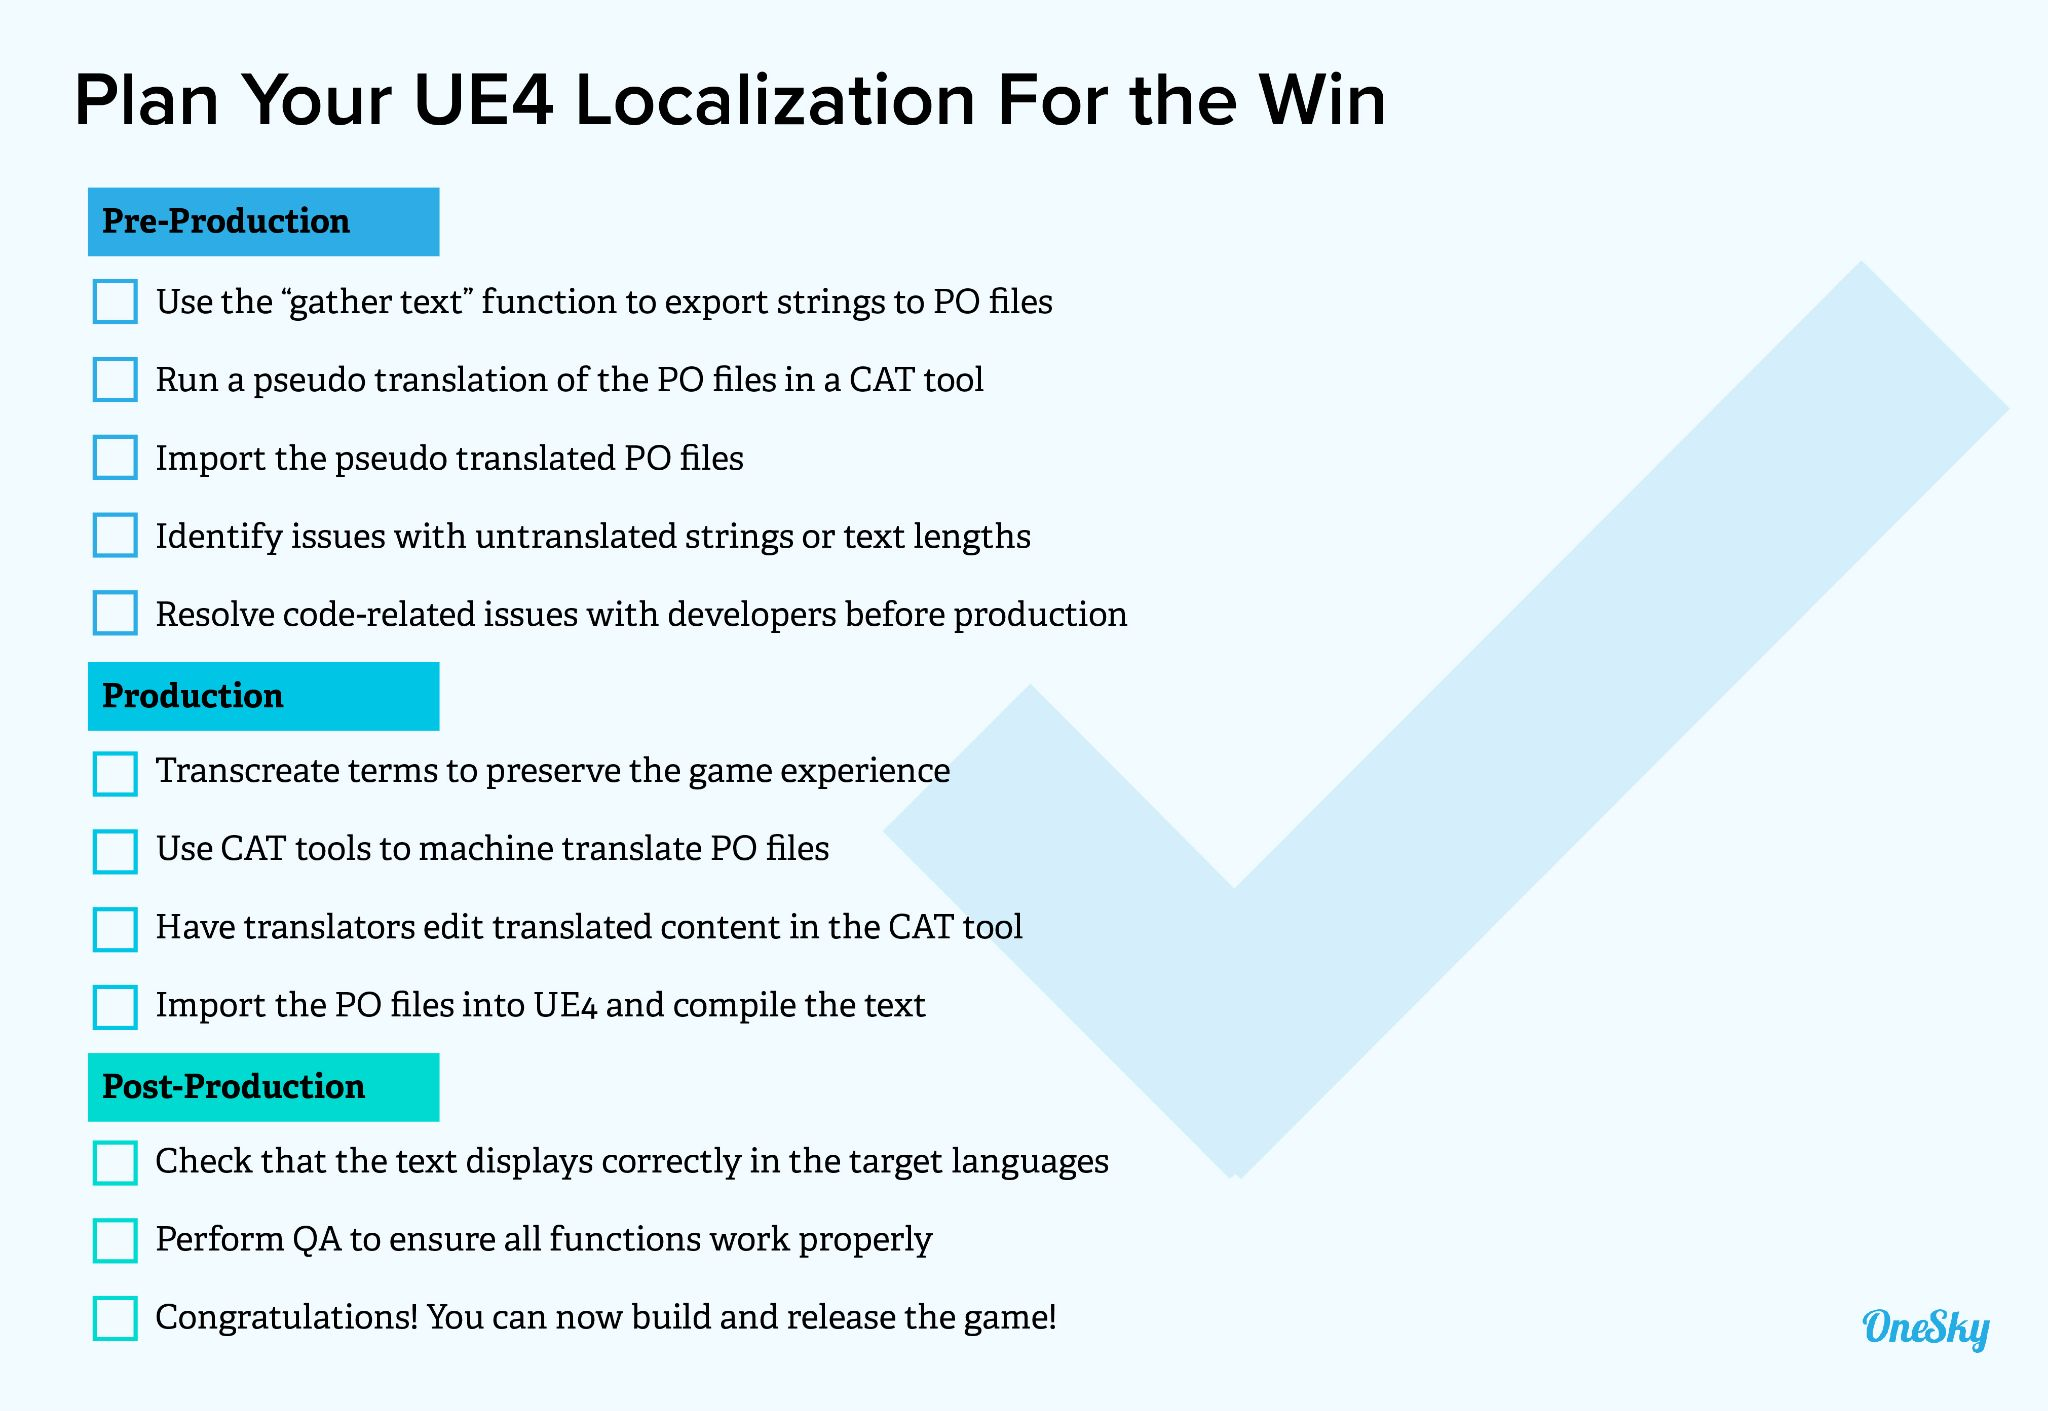
Plan Out Your UE4 Localization Process
The UE4 localization process can be divided into pre-production, production, and post-production. Whenever possible, use computer-assisted translation (CAT) tools to support human translators so you can shorten the timeline without sacrificing translation quality.
For more tips on planning and managing the game localization process, download our Complete Guide to Localization Management.
Use the Right Translation Resources
Typically, hiring professional translation services offers the best chance of creating high-quality translations. However, the complexity of UE4 can make it challenging for translators who aren’t avid gamers to grasp the nuances.
Meanwhile, Unreal’s sizable user community of avid gamers makes crowdsourcing UE4 text localization a viable option. A crowdsourced approach can help make the translation process more cost-efficient. You can also leverage the opportunity to engage the community and support your marketing efforts.
However, it isn’t always easy to maintain consistent quality when you have different people translating the content. Consider a hybrid approach by hiring professional translators to review the crowdsourced translations from the community to ensure consistency, accuracy, and quality of the translated content.
Ensure High-Quality Game Localization For Unity and UE4
A well-designed localization management process and an air-tight QA workflow can help ensure that your localized games are of the highest quality.
Your QA process should check that all the localized content displays correctly and the UI allows room for longer text lengths. Check that all the fonts are working in each target language and date, time, and currencies are shown in the right format.
Last but not least, give your localization team the tools they need to ensure a streamlined and accurate localization process.
While spreadsheets are cheap and easy to use, they aren’t ideal for collaboration and version control when many different team members are involved in game localization.
Instead, use a robust localization management platform to orchestrate the end-to-end game localization process. Automation helps eliminate delays and bottlenecks, while streamlined workflows ensure that you have accounted for all the moving parts.
OneSky supports 19 file formats, offers professional translation services in 50+ languages, and allows you to communicate with translators all on one unified platform. You can also use our screenshots management, glossary tools, and on-device testing to create a consistent gaming experience across markets.
Learn more and see how we can help you localize your game cost-effectively.
 Written by -
  Written by -
  Written by

 Written by